

If anyone is interested in how she was made, read on...
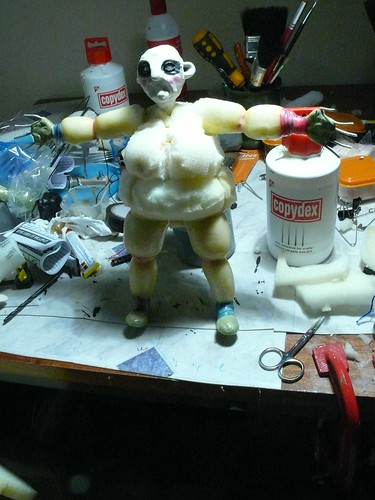
First I constructed an armature for her using aluminium armature wire and epoxy putty, with nuts in her feet for tie-down bolts and added the latex build-up head I described making in the previous post.
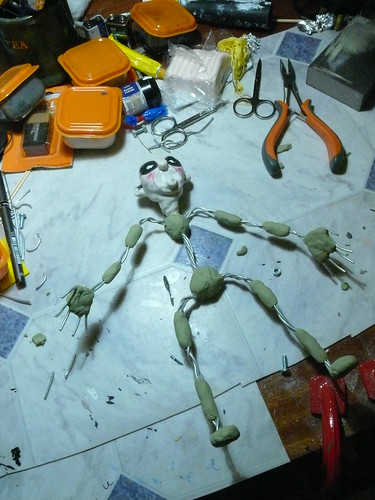
I wrapped the armature in upholstery foam glued in place with Copydex (latex glue) and some hot glue. I used embroidery thread tied around her joints and waist to make contours, and wound lots of thread around her wrists and ankles to cover the wire. I then snipped the foam of her body into shape with sharp scissors.
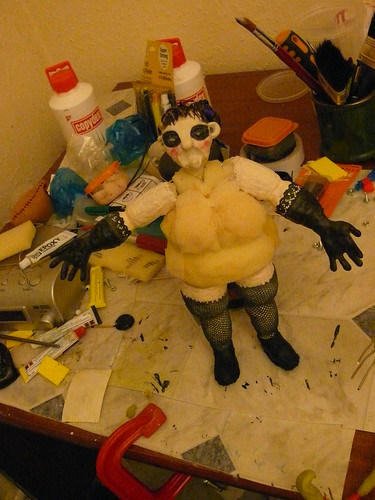
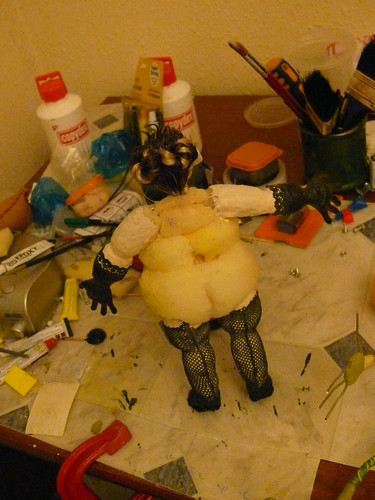
I covered her hands, arms and legs in a few coats of clear liquid latex (Copydex again) to form a skin, then continued to build up coats of coloured latex (tinted with Games Workshop model paint). Her gloves were built up with black latex, with some lace glued around the edges.
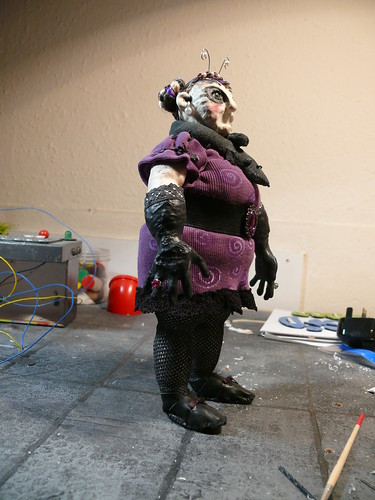
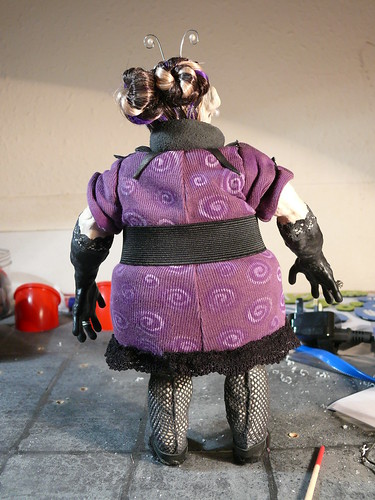
I cut up an old pair of fishnet tights up and sewed them onto Edna's legs with a seam up the back, then I dabbed watered-down liquid latex onto the stockings and let them dry, which left them rubberised and stuck firmly to Edna's legs. Edna's shoes were made of very soft leather (from an old jacket) glued then sewn to her feet.
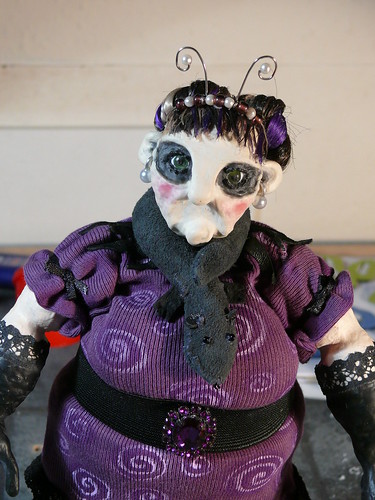
I made her hair using three colours of fake nylon hair (blonde, dark brown and violet) carefully glued to her scalp bit by bit using watered down PVA glue then trimmed to shape. I wrapped lengths of watered-PVA soaked hair around pieces of aluminium wire and fixed the ends in place with elastic bands. Once they had dried I bent the wire into spirals and glued them to her head to form buns.
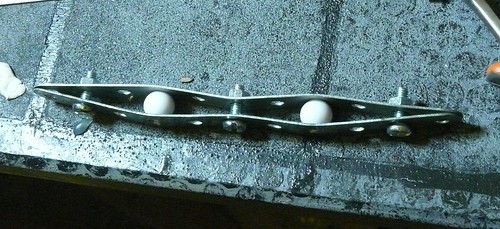
I made eyeballs for Edna (and Walt) using plastic beads from cheap jewellery. I drilled a circular indent into the centre of each bead to form the iris. I found that this was much easier to do after I made a basic drilling jig out of a few old bits of Meccano which allowed me to drill dead-centre each time:

I then coloured the iris of the eyes with waterproof marker and scratched lines in them with a pin, and put a small blob of black plasticine to form the pupil, before covering it all with a convex lens of clear 5-minute epoxy resin. Just before it was fully cured I stuck a pinhole in the lens to allow me to move the eyes easily.
Edna's dress was made using the sleeve of a cotton-jersey top, painted on with watered down acrylic paints. I sewed the dress onto Edna, adding ribbon, lace and leather details. Edna's 'bling' is all cheap nasty costume jewellery - her belt is just black elastic with a big earring for the buckle, and her rings are more earrings, her earings are plastic pearls glued to wire. Her hairband is made from paperclips, beads and epoxy. The 'dead fox' was sewn using more soft leather used wrong-way-round to give a fur effect without the hassles of real fur.
And that's it...
I'll be back with photos once I've made Walter some clothes!
Oh my gosh, Ceri! She's FABULOUS!
ReplyDeleteHey there! Brilliant costuming, love the hair!
ReplyDeleteREALLY cool puppet !!
ReplyDeletejriggity
wow nice costume work. Edna is rocking the purple! Nice work :)
ReplyDeleteEdna's come up looking great! Love the costume, the body shape, the whole thing!
ReplyDeleteYour puppets look amazing. Thank you so much for sharing the techniques. Really well explained and great documentation. And of course the puppets are artful and gorgeously detailed. Can't wait to see how your project evolves.
ReplyDelete